
It's mid July.. Where the heck has this year gone?!!
I have officially finished my second year of University and the lease for my third year house has began... But I still feel like I'm that 18 year old finishing her A levels in the summer of 2011!!!!!!!!
My baking-record has been appalling this last year, and I apologise. I usually keep my blog posts strictly cake-based and acknowledge that a majority of my audience don't actually care too much about my personal life. However, a couple of anecdotes here and there never hurt anybody?!
My boyfriend graduated at the start of July, and obviously I wasn't allowed to join his family to watch on the day unless I baked something..
We drove up to Leeds in two cars, stopping mid-way for lunch and dinner picnics. I needed to bake something which was mess-free, easy to eat, and easy to transport..
Voila, the cake pop!!
I'm not too sure where the cake pop originates from, but it's such a great idea and ridiculously easy to eat at 75mph on the M1 with one hand on the steering wheel (and simultaneously keeping our eyes peeled for Eddie Stobart vans).
I baked a lemon cake, crumbled it up and mixed with lemon-cream cheese frosting, forming the mixture into 'uniform' sized balls and enveloping them in white chocolate. A lollipop stick completes this tasty treat and, depending on how big your mouth is, the cake can be demolished in one or two bites.

I used this cupcake recipe.
Instead of a 12-hole muffin pan, I just used a normal 8-inch sandwich cake tin.
I kept the temperature at 180C, but increased the cooking time to 25-30 minutes.
Keep an eye on the cake and it's done when it's firm to the touch and a skewer inserted comes out clean.

Leave it to cool for a good few hours.
It can be a little bit sticky, but it's manageable. It's supposed to be a moist cake, and it tastes incredible on its own!
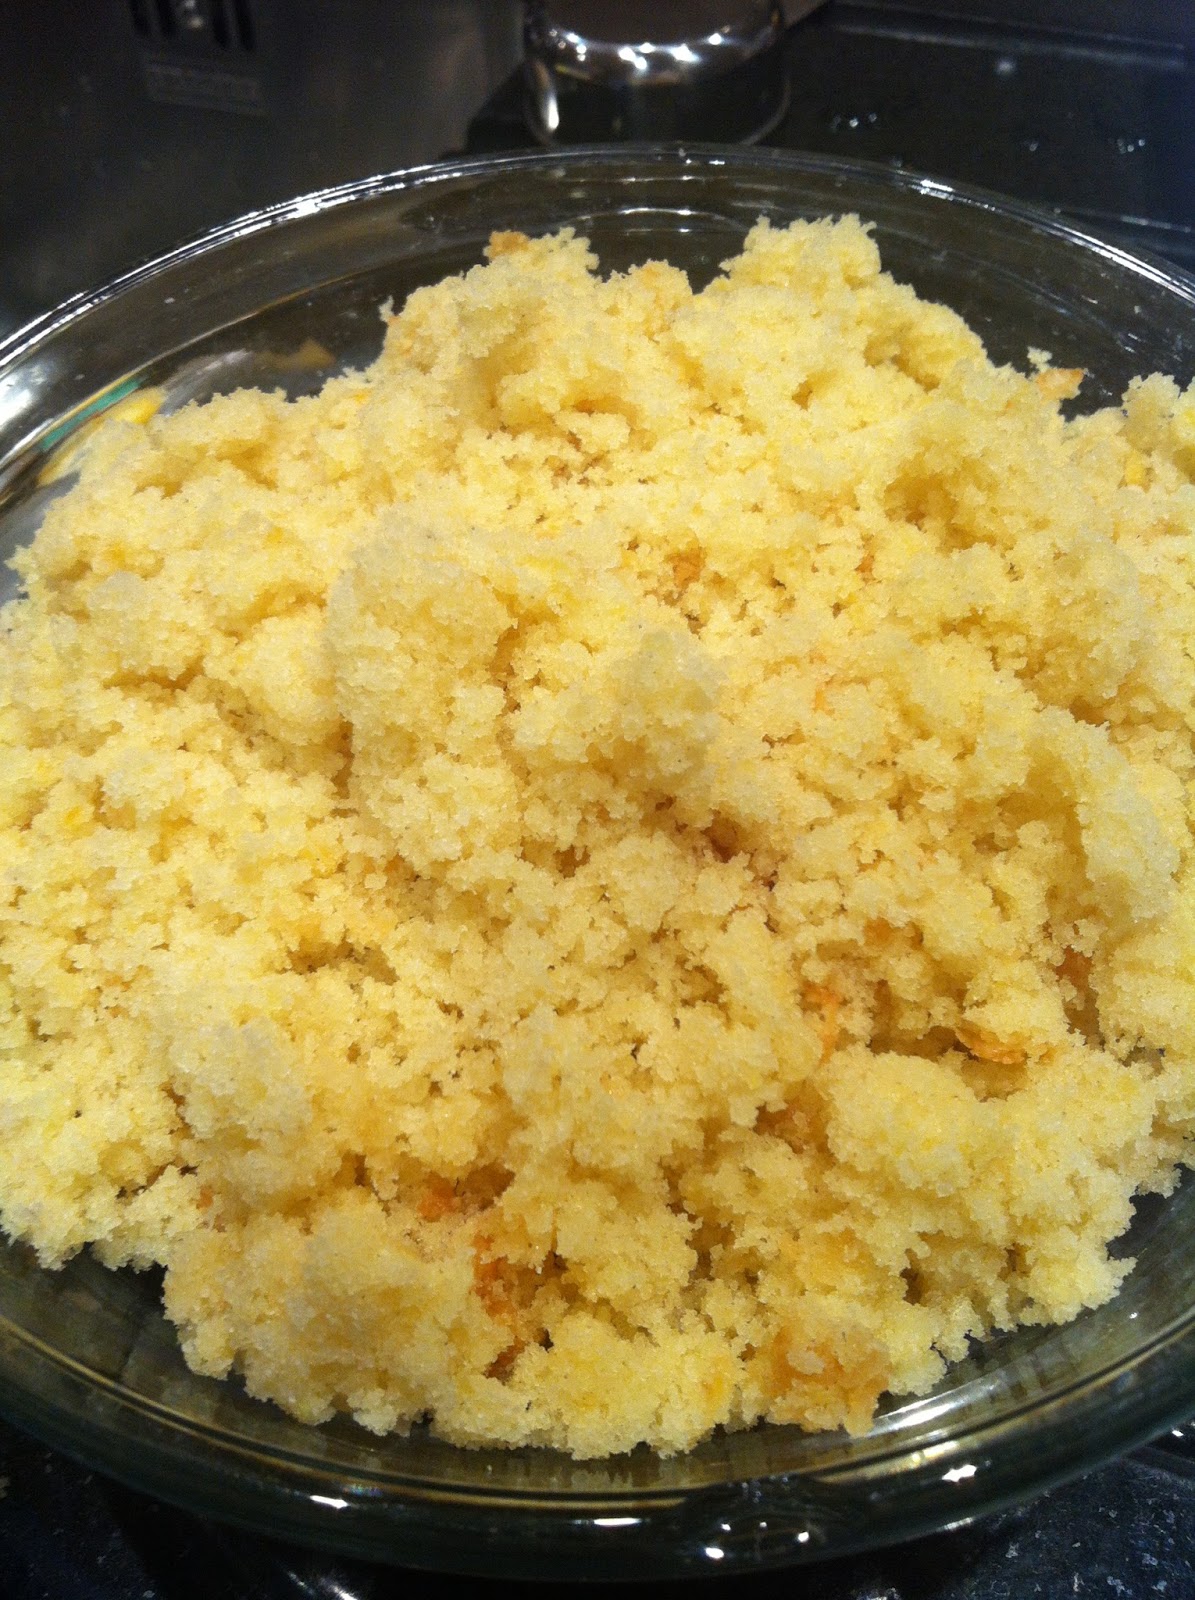
Crumble up the cake either in a food processor or with a hand-grater.
FROSTING
Only a tiny bit of frosting is needed here, so any recipe you use is likely to generate a hefty surplus!
Just use equal parts of unsalted butter and cream cheese. Add icing sugar, to taste. I added a touch of soured cream and a little splash of lemon juice to add a bit of zestiness.
Mix the frosting into the cake crumbs and form into balls.
Mine came out a bit awkwardly-shaped. Practice makes perfect I guess!!

They look a bit like deformed matzah balls...
The consistency makes it really hard to roll them without major crumbling. Just keep working at it. Once you're done, put them in the fridge for a couple of hours (I left them overnight). Once cold, they can be rolled in order to perfect the shape.
For the covering, melt between 2 and 3 big bars of Milky Bar. I know it's a lot of chocolate, but it's yummy, and the molten leftovers were great with my breakfast (so nutritious).
Insert a lollipop stick into each cake-ball, and dip in the chocolate.

Set the pops aside to dry - there is no ideal way of doing this. I stood them up individually in mugs - if anyone else has a suggestion (using typical items found in all kitchens) then please holler at me.
The last time I did this (with chocolate covered strawberries), my mum entered the kitchen and accidentally knocked them all over. This time however, everything stayed upright and intact!

Whilst the white chocolate is drying, sprinkle on a little extra lemon zest - just so the flavour is (somewhat) apparent to the person about to stuff it into their mouth!!


Unless kept at a very cold temperature (i.e in a fridge), these babies are prone to intense melting. Since we took them in the car up to Leeds on an extremely warm day, I wrapped them in foil and put them in a food bag with a couple of freezer packs. They stayed solid all day long, perfect for a nibble on the way back to London at 9pm!!
Undeniably, they are awkwardly-shaped. However, they taste phenomenal, I promise you!!
That's all for now. Hope you enjoyed!
J xx
No comments:
Post a Comment